
Home Improvement How-To's: Install Wainscoting
|
Wainscoting provides
an intimate, traditional feeling in dens, bedrooms, and bathrooms, as
well as a somewhat formal look for dining rooms. |
||
|
SKILL SCALE Medium
TIME REQUIRED TOOLS MATERIALS |
||
| STEPS | ||
|
|
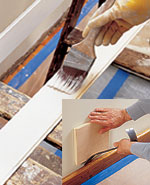 |
Prefinish all the materials before you begin the installation. Remove the baseboard and outlet covers. If you are reusing the baseboard, carefully pry it from the wall. You may prefer to use new baseboards with a groove to hold the lower ends of the wainscoting boards. Install outlet box extension rings that allow you to bring the outlet to the wainscoting surface. |
|
|
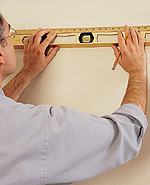 |
Draw a line for the top edge of the wainscoting. Determine the height for the wainscoting, measure up from the floor, and with a level, extend a line around the room. |
|
|
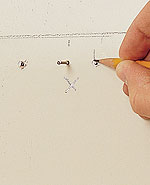 |
Locate the studs. The top and the bottom of the wainscoting are held in place by a cap rail and a baseboard nailed into the studs. Locate the studs with a nail or stud finder and mark them both at floor level and just above the level line. (Don't drive nails near electrical outlets or switches.) |
|
|
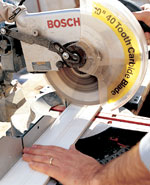 |
Cut the wainscoting to length. Begin at either end of the wall, and measure to determine the length of the wainscot boards. If you have a rabbeted baseboard, measure from the bottom of the rabbet to the line marking the top of the wainscoting. If the baseboard will be attached after the wainscoting is installed, measure between the line and the floor. Don't cut everything all at once; the length of the boards may change as you move along because of uneven or unlevel floors. |
|
|
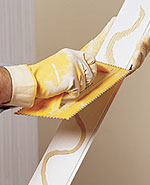 |
Glue the wainscoting in place. Butt the grooved end of a board into a corner and nail it in place. Run a wavy line of construction adhesive along the back of several boards. Spread the glue with a notched trowel as you slip the boards into place. Slide the tongues in the grooves, leaving a 1/16-inch space between the visible edges to allow for expansion in humid weather. Align the top edges with the level line; check the edge for plumb with a level. Press the boards with the heels of your hands to help bond the boards with the wall. |
|
|
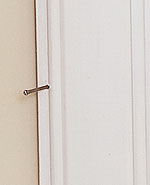 |
Once you install the boards you've cut to length, measure for the next two or three boards, and cut and install them. Whenever a board is over a stud, nail it in place. Hide the nail in the groove along the bead or drive it through the tongue if possible. Cut or plane as much of the last board as needed to make it fit. Install it by slipping it down from above. |
|
|
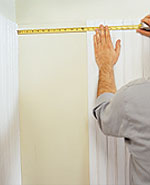 |
Out-of-plumb corners. Make adjustments several boards away. Measure between the last board and the corner at both the top and bottom of the wainscoting; divide the difference by the number of boards remaining to be installed. If the difference is within 1/16 inch, install the remaining boards slightly out of plumb so the last one will be flush with the adjoining wall. If the gap is more than 1/16 inch, scribe the last board to fit. |
|
|
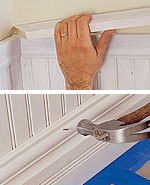 |
Install the cap rail and baseboard. Nail the cap rail in place with #6 or #8 finishing nails. Miter inside and outside corners. If the rail is complex, cope inside corners. If the baseboards go on top of the beaded boards, nail them in place using #8 finishing nails. Countersink and fill all nail holes. If you paint the wainscoting, seal any gaps with paintable caulk. |