Home Improvement How-To's: Install Cabinet Drawer Fronts
|
Drawer fronts come in
two types – solid and applied. Solid drawer fronts are an integral
part of the drawer. Applied fronts are screwed to the front of a
pre-made drawer box. To replace solid fronts, you'll saw off
overlapping edges and screw the new front to the face of the old. For
applied fronts, unscrew the old fronts to remove them, then attach the
new ones. |
||
|
SKILL
SCALE Easy
TIME REQUIRED TOOLS
MATERIALS
|
||
| STEPS | ||
|
|
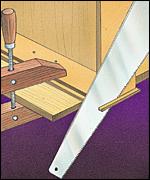 |
Use a handsaw to cut off all overhanging edges of existing solid drawer fronts. Clamp the drawer to a solid work surface to make this job easier. If the drawer fronts are two-piece, simply remove the screws and discard the decorative face panel. |
|
|
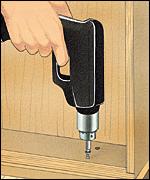 |
Attach the new fronts by drilling pilot holes and driving screws through the inside of the drawers into the new fronts. Make sure the drawer fronts overlap the drawers by an equal margin on all sides. |
|
|
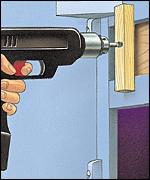 |
You can attach false drawer fronts on sink and cooktop cabinets by cutting wood blocks that span the drawer openings. Place the blocks across the openings on the inside of the cabinets, then drive screws through the wood blocks into the false drawer fronts. |