Home Improvement How-To's: Installing a Thermostat
|
Forget the stock
market. Few hour-long home-improvement projects will pay year-in,
year-out cost-savings dividends like replacing your old thermostat
with a new programmable - or "automatic setback" - model. Depending on
the severity of the winters where you live, you could realize a
savings of up to 35 percent on your yearly energy bills. Who wouldn't
want to do that? |
||
|
SKILL
SCALE Easy
TIME REQUIRED TOOLS
MATERIALS |
||
| STEPS | ||
|
|
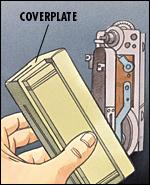 |
Turn off the power to your heating and air-conditioning system at the main service panel. Remove the old thermostat cover plate. |
|
|
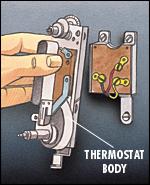 |
Unscrew the thermostat mounting screws, and remove the thermostat body. |
|
|
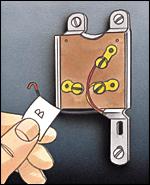 |
Label the low-voltage wires to identify their screw-terminal locations using masking tape. Then disconnect the wires. |
|
|
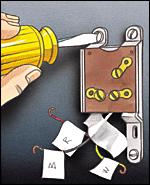 |
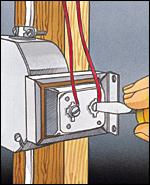
Remove the thermostat base by loosening the mounting screws. Tape the wires to the wall to prevent them from slipping into the wall cavity. |
|
|
 |
Thread the low-voltage wires through the base of the new thermostat. Mount the thermostat base on the wall using the screws included with the thermostat. |
|
|
 |
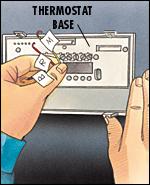
Connect the low-voltage wires to the appropriate screw terminals on the thermostat base. Follow the installation diagram in your new thermostat's owner's manual. |
|
|
 |
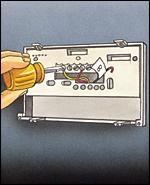
Locate the low-voltage transformer that powers the thermostat. The transformer usually is located near the heating/air-conditioning system or inside a furnace access panel. Tighten any loose wire connections, and make sure the wires and sheathing are in good condition. |
|
|
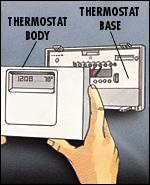 |
Install the battery or batteries in the thermostat body, and attach the body to the thermostat base. Restore power, and program the thermostat as desired. |