Home Improvement How-To's: Replacing a Door Bell
|
"Ding dong." If your doorbell is sounding a little sick these days ... or, worse, not sounding at all ... the simplest solution may be to install an entirely new unit. Here's how to install it. |
||
|
SKILL SCALE Easy TIME
REQUIRED
|
||
| STEPS | ||
|
|
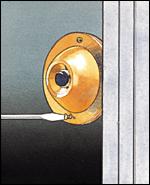 |
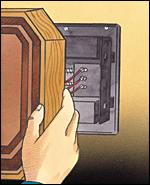
Turn off the power to the doorbell system at the main service panel. Remove the doorbell-button mounting screws, and carefully pull the button switch away from the wall. |
|
|
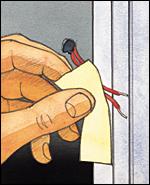 |
Disconnect the wires from the button switch, and be sure to tape them to the wall to keep them from slipping into the wall cavity. Connect the wires to the screw terminals of the new switch. |
|
|
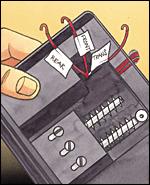 |
Remove the cover plate of your old chime unit. Unscrew the mounting screws, and remove the old unit. Disconnect the wires, and label them to identify their screw-terminal location, again taping them to the wall to keep them from slipping into the wall cavity. (You'll hate it if that happens.) Thread the wires through the base of the new chime unit. |
|
|
 |
Attach the new chime unit to the wall using the mounting screws thoughtfully included in your installation kit. |
|
|
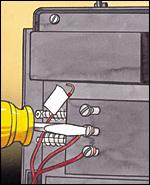 |
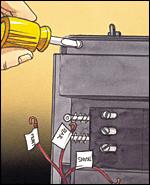
Connect the wires to the appropriate screw terminals on the new chime unit (now aren't you glad you labeled them?). |
|
|
 |
You're almost done. Now just attach the new cover plate and |