Home Improvement How-To's: Weatherproofing Your Entry Door
|
Unless you have a
brand new home, your door may have fallen out of alignment. Take the
time necessary to make certain your door fits straight and true before
you begin weatherproofing. (This extra step will also save on
weatherproofing material!) Start by evening out the gaps around the
door. Reset and shim the hinges (if necessary) to even out the gaps.
Keep in mind that if you plan to attach a new door bottom with a drip
edge, you may have to plane the bottom of the door slightly. Then, of
course, you'll want to make certain the strike plate and latches are
in alignment. |
||
|
SKILL
SCALE Easy
TIME REQUIRED TOOLS
MATERIALS |
||
| STEPS | ||
|
|
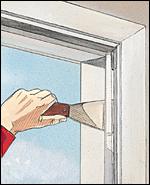 |
Install metal tension strips next to the door stops at the point where your door contacts the stops when closed. Use a putty knife to pry out the tension strips far enough so that it creates a good seal when the door is closed. |
|
|
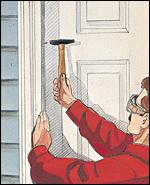 |
Add an aluminum or vinyl door jamb weatherstrip to the edge of the door stop on the external side |
|
|
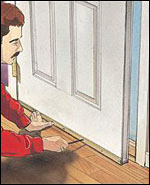 |
Attach a new bristle sweep to the bottom of the door. Here's an option: You may prefer to attach a new door bottom with an integral sweep on the inside and drip edge on the outside. This often requires that you adjust your threshold height, and/or slightly plane the bottom of your door. If you plane the door, make sure to seal the wood. |
|
|
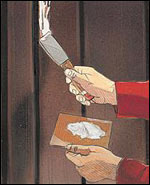 |
Fix any cracks in door panels or around light panels with wood filler or caulk. |